In Windows, you can change the template, column width, Group by, Sort by, and layout view of items in your folders to how you like.
In addition to sorting, you can also group files by property. Like sorting, grouping won't significantly change the way files are displayed. It just breaks them into different sections, depending on which property detail you choose. So, if you have a folder full of text documents, you might want to group them by type to see which app was used to create them. Or, if you're dealing with photos, you can group them by date to separate them by the date they were taken.
This tutorial will show you how to change the group by view of items in a folder in File Explorer for your account in Windows 10.
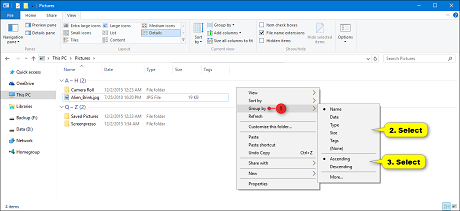
To Change Folder Sort by View from Context Menu1. In File Explorer (Win+E), open the folder you want to change the group by view of its content.
2. Right-click or press and hold on an empty area inside the folder, click/tap on Group by, and click/tap on the detail (ex: Name) you want to group items by in this folder. (see screenshot below step 3)

3. Select to group items in this folder by ascending (default) or descending order with the selected detail (ex: Name) from step 2. (see screenshot below)
 click to enlargeTo Change Folder Group by View from File Explorer Ribbon
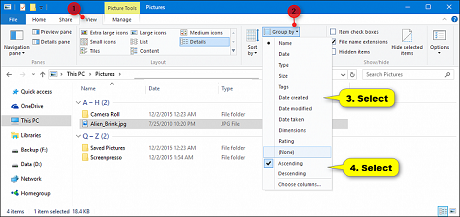
1 In File Explorer (Win+E), open the folder you want to change the group by view of its content.
2 Click/tap on the
View tab (Alt+V). (see screenshot below
step 4)
3 Click/tap on
Group by in the ribbon, and click/tap on the detail (ex: Name) you want to group items by in this folder. (see screenshot below
step 4)
4 Select to group items in this folder by
ascending (default) or
descending order with the selected detail (ex: Name) from
step 3. (see screenshot below)