One of Microsofts new features in Windows 7coming the second half of 2009is called Libraries. The point behind this feature is to provide an easier and faster way to search, view, and your access documents, photos, music, videos, and other data. Plus the Libraries come into play when sharing on your network. In addition to being able to share individual folders as you did in previous Windows releases, you will now be able to share an entire Library.
Understanding the Windows 7 Libraries
You could say Libraries are virtual folders. You add folders to Libraries, where you can view and access the contents of each added folder from the single Library window. A Library itself cant contain any files as they arent real folders, but they offer one-stop access to a collection of folders. See Figure 1 for example of the default Documents Library.
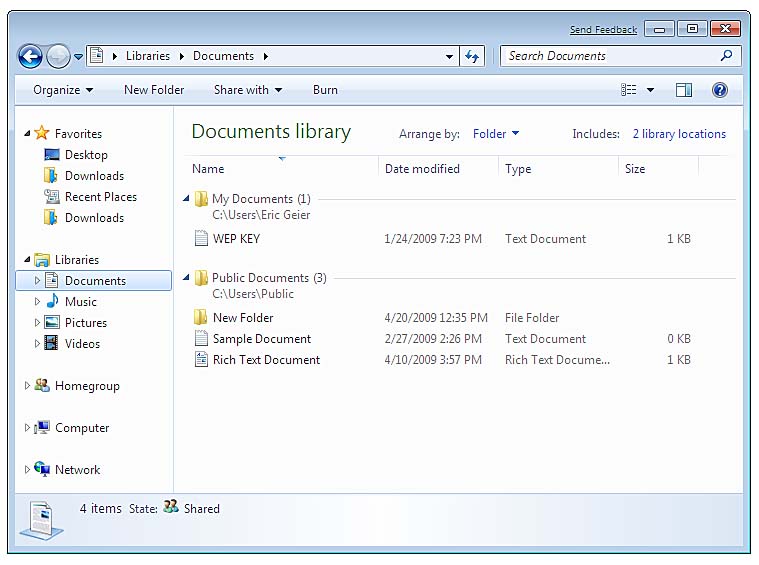 The default Documents Library
Here are several ways you can make use of Libraries:
Add folders that are scattered throughout your hard drive(s) to Libraries. For example, if you have a hard drive dedicated to music, you can add it to the Music Library. Another example: If you have folders on the desktop, you can add them to the appropriate Libraries.
Create custom Libraries. For example, when I start a new writing assignment, I can create a new Library. I could add related folders such as the one that contains the publications guidelines, folders on previous work that I think Ill want to reference, and folders containing any downloaded research. Then instead of hunting for those folders each time I need something, I just open the custom Library. Then when Im done with the assignment, I can delete the Library.
Add network locations (shared folders from other computers) to Libraries. This is useful if you work on multiple computers. For example, instead of browsing through all the shared folders of a particular computer (or multiple computers) to find your Word documents, you could add the Documents folder from every PC in the home to the Documents Library. Then when you want to find a document, youd just open the Library, giving you access to local and shared files, from one window.
Using the Default Windows LibrariesMicrosoft starts you off with several Libraries: Documents, Music, Pictures, and Videos. By default, each of these already has the associated private and public folders added. For example, when you open the Documents Library, youll see the contents of your Documents folder (C:\Users\yourname\Documents) that only you and Administrators can access, and the Public Documents folder (C:\Users\Public\Documents) that everyone can access.
The links on the Start Menu, Windows Explorer, file dialogs, and other spots for the Documents, Music, Pictures, and Videos now point to the Libraries, not your private folders. In Windows XP and Vista, for example, clicking the My Documents or Documents button on the Start Menu would bring up the private documents folder. However, for the sake of this new feature, the Documents button on the Start Menu and other places in Windows 7 opens the Documents Library.
Remember, the default private and public folders still remain in Windows 7; the Library feature simply displays these folders in a single window. Additionally, adding a folder to a Library doesnt copy the files over; it simply shows you the contents.
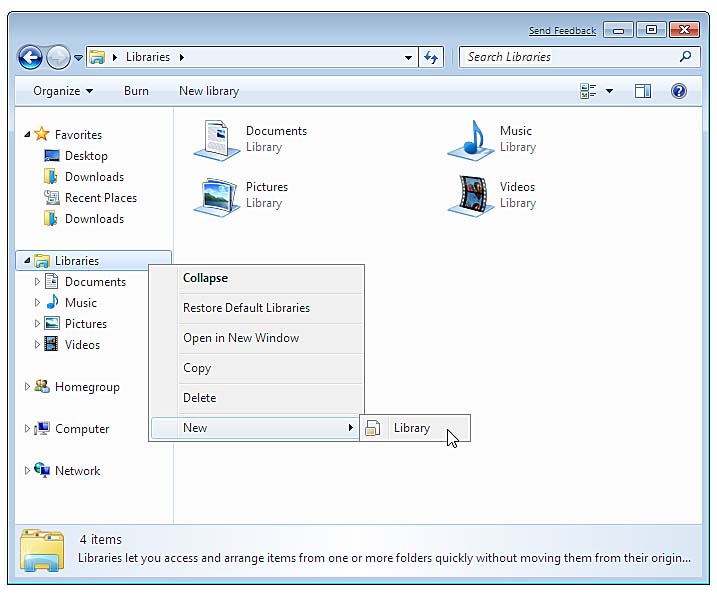
Creating New LibrariesMaking custom Libraries is easy. Simply open Computer, right-click the Libraries icon on the left, hover over New, and click Library, as Figure 2 shows. Then to name it, right-click the new icon, click Rename, and type in a name. Thats it. To add folders and to set the default saving folder, see the next sections.
 Creating a custom LibraryAdding or Removing Folders for a Library
If youve created a new library, it wont contain any folders. To add a folder, open the Library and click the Include a Folder button. Then simply browse to and select the desired folder, and click the Include Folder button when youre finished.
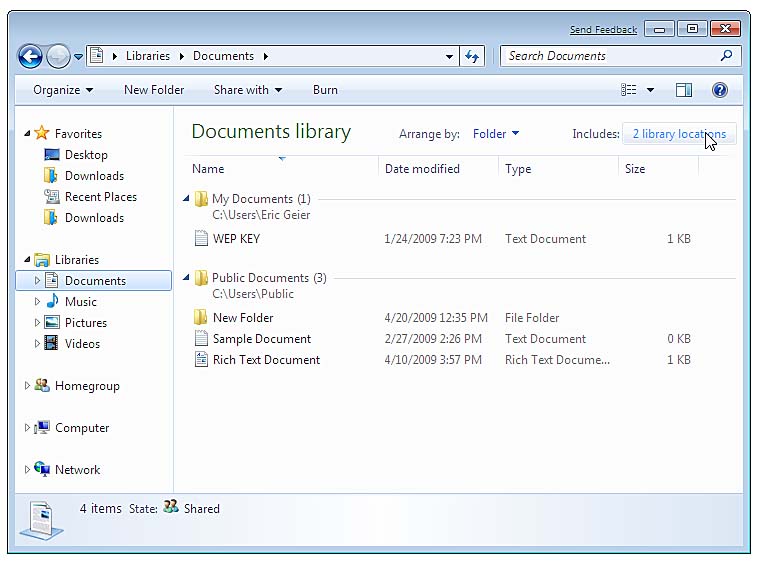
To add additional folders to a Library, open the Library and click the Includes link in the upper-right corner, such as Figure 3 shows. As Figure 4 shows, the Library Locations dialog appears. To remove a folder, select it and click Remove. To add a folder, click the Add button, browse to and select the desired folder, and click the Include Folder button.
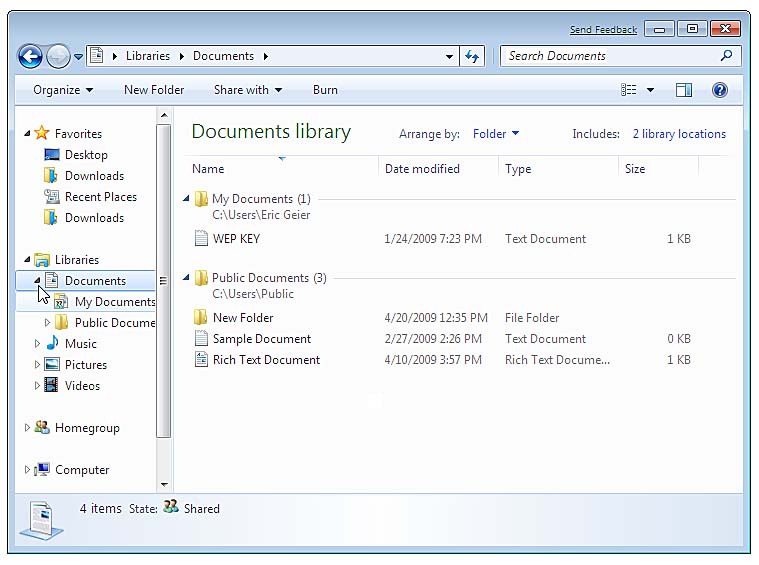
 Making additional folders in the Library.
 Removing a folder from the Library
As with many other Windows features, you have another way you can manage the Libraries. Open Computer, right-click a Library icon on the left pane, and click Properties. This brings up the Librarys properties dialog,
 Further managing your Library
Changing the Default Save Folder for a Library
When youre saving a file, you can select a Library to save it in. However, because Libraries arent real locations, the file is stored to the Defined Save folder. The default Libraries are set to save files in the associated private folder, such as My Documents instead of Public Documents. You can change which included folder is the Save folder. To do this, click the Includes link in the upper-right corner of a Library. Then on the dialog, right-click the desired folder, select Set as Default Save Location, and click OK. If you prefer using the Librarys properties dialog, you can do the same thing there.
If you find in the future that you want to save to a different folder of a Library, you can expand the folders of the library to select the desired one, such as seen in Figure 6. The save location is used if you simply select the Library when saving, not a particular folder. Additionally, if you drag or copy a file to the Library, its directed to the designated save location. Again, if you dont want this default location, you can still expand the Library tree to see the included folders, or you can carefully drag or copy the file under the folder in the main Library window.
 Expanding your Librarys folders
Now you should understand the usefulness of the new Library feature in Windows 7. You should also know how to use the default Libraries, create new ones, and add/remove folders from them. Plus you should understand how to change the default save location for Libraries.
